How to make background color transparent in css
Содержание:
- CSS Properties
- CSS Advanced
- Select Object Using Magic Select Tool
- Свойство CSS background-image
- Save Transparent Image
- Color Names
- Резюме
- CSS Multiple Backgrounds
- CSS background-clip Property
- CSS Advanced Background Properties
- Background Color HTML
- HSLA Colors
- Фон на веб-странице
- Transparency using RGBA
- Свойство CSS background-size
- Изучаем новые свойства фона
- CSS Background Size
- Lorem Ipsum Dolor
- Define Sizes of Multiple Background Images
- Full Size Background Image
- Hero Image
- CSS background-origin Property
- CSS background-clip Property
- CSS Advanced Background Properties
- Example
CSS Properties
align-contentalign-itemsalign-selfallanimationanimation-delayanimation-directionanimation-durationanimation-fill-modeanimation-iteration-countanimation-nameanimation-play-stateanimation-timing-functionbackface-visibilitybackgroundbackground-attachmentbackground-blend-modebackground-clipbackground-colorbackground-imagebackground-originbackground-positionbackground-repeatbackground-sizeborderborder-bottomborder-bottom-colorborder-bottom-left-radiusborder-bottom-right-radiusborder-bottom-styleborder-bottom-widthborder-collapseborder-colorborder-imageborder-image-outsetborder-image-repeatborder-image-sliceborder-image-sourceborder-image-widthborder-leftborder-left-colorborder-left-styleborder-left-widthborder-radiusborder-rightborder-right-colorborder-right-styleborder-right-widthborder-spacingborder-styleborder-topborder-top-colorborder-top-left-radiusborder-top-right-radiusborder-top-styleborder-top-widthborder-widthbottombox-decoration-breakbox-shadowbox-sizingbreak-afterbreak-beforebreak-insidecaption-sidecaret-color@charsetclearclipclip-pathcolorcolumn-countcolumn-fillcolumn-gapcolumn-rulecolumn-rule-colorcolumn-rule-stylecolumn-rule-widthcolumn-spancolumn-widthcolumnscontentcounter-incrementcounter-resetcursordirectiondisplayempty-cellsfilterflexflex-basisflex-directionflex-flowflex-growflex-shrinkflex-wrapfloatfont@font-facefont-familyfont-feature-settingsfont-kerningfont-sizefont-size-adjustfont-stretchfont-stylefont-variantfont-variant-capsfont-weightgapgridgrid-areagrid-auto-columnsgrid-auto-flowgrid-auto-rowsgrid-columngrid-column-endgrid-column-gapgrid-column-startgrid-gapgrid-rowgrid-row-endgrid-row-gapgrid-row-startgrid-templategrid-template-areasgrid-template-columnsgrid-template-rowshanging-punctuationheighthyphens@importisolationjustify-content@keyframesleftletter-spacingline-heightlist-stylelist-style-imagelist-style-positionlist-style-typemarginmargin-bottommargin-leftmargin-rightmargin-topmax-heightmax-width@mediamin-heightmin-widthmix-blend-modeobject-fitobject-positionopacityorderoutlineoutline-coloroutline-offsetoutline-styleoutline-widthoverflowoverflow-xoverflow-ypaddingpadding-bottompadding-leftpadding-rightpadding-toppage-break-afterpage-break-beforepage-break-insideperspectiveperspective-originpointer-eventspositionquotesresizerightrow-gapscroll-behaviortab-sizetable-layouttext-aligntext-align-lasttext-decorationtext-decoration-colortext-decoration-linetext-decoration-styletext-indenttext-justifytext-overflowtext-shadowtext-transformtoptransformtransform-origintransform-styletransitiontransition-delaytransition-durationtransition-propertytransition-timing-functionunicode-bidiuser-selectvertical-alignvisibilitywhite-spacewidthword-breakword-spacingword-wrapwriting-modez-index
CSS Advanced
CSS Rounded CornersCSS Border ImagesCSS BackgroundsCSS ColorsCSS Color KeywordsCSS Gradients
Linear Gradients
Radial Gradients
Conic Gradients
CSS Shadows
Shadow Effects
Box Shadow
CSS Text EffectsCSS Web FontsCSS 2D TransformsCSS 3D TransformsCSS TransitionsCSS AnimationsCSS TooltipsCSS Style ImagesCSS Image ReflectionCSS object-fitCSS object-positionCSS ButtonsCSS PaginationCSS Multiple ColumnsCSS User InterfaceCSS Variables
The var() Function
Overriding Variables
Variables and JavaScript
Variables in Media Queries
CSS Box SizingCSS Media QueriesCSS MQ ExamplesCSS Flexbox
CSS Flexbox
CSS Flex Container
CSS Flex Items
CSS Flex Responsive
Select Object Using Magic Select Tool
For that, follow these steps:
Step 1: Open your image in Paint 3D.
Step 2: Click on the Magic Select tool present in the top bar.
![]()
![]()
Step 3: A selection box will appear. Use the corners or sides of the box to select the portion of the image whose background you want to change. Then click on Next on the right side.
![]()
![]()
![]()
![]()
Step 4: Paint 3D will automatically detect the object inside the selection. If you are satisfied with the selection, click Done on the right side. Otherwise, use the Add or Remove tools also present on the right side to modify the selection.
Click on the Add tool and then select the part of the image that you want to add to your selection. Similarly, click on Remove tool and click the area that you want to remove.
![]()
![]()
Step 5: Once you press the Done button, you will see a new box appears outside the selected image indicating that it’s now a separate object. You can use the various tools present on the box to rotate or flip the image.
![]()
![]()
Свойство CSS background-image
Это свойство используется для того, чтобы задать в качестве фона изображение (.png, .jpg, .gif, .svg) или градиент (по сути также являющийся изображением, которое генерирует браузер).
В качестве значения указывается путь к файлу изображения или data URI (изображение, закодированное в base64). Кавычки можно использовать как одинарные, так и двойные, а можно и вообще не использовать. В данном случае это дело вкуса.
Для того, чтобы задать в качестве фонового изображения градиент (постепенный переход от одного цвета к другому) используются CSS-функции и .
создает переход между цветами как бы вдоль прямой линии (например, слева направо, сверху вниз, из левого нижнего угла в правый верхний и т.д.).
создает переход от центра к периферии.
Save Transparent Image
With the background out of the way, it’s time to save our final image. For that, follow these steps:
Step 1: Hit the Menu icon and select Save as from the menu with the format as Image.
![]()
![]()
![]()
![]()
Step 2: Next, you need to make sure two things. First, the drop-down box under Save as type should be showing PNG (image). If it’s showing any other format, change it to PNG (image). Secondly, the Transparency box should be checked.
![]()
![]()
Saving the file in PNG format is extremely important. If you save in JPG, which is different from PNG, you will lose the transparency.
Tip: In case you forget to make the white background transparent using Canvas options, check the box next to Transparency when saving the image. That should do the trick.
Step 3: Finally, click on the Save button. You will be asked to assign a name and choose the save location. Congratulations! Your image with a transparent background is ready.
Note: Even though we are making the background white first and then removing it, you need to follow all the steps mentioned above for images with the white background too.
Color Names
Below is a list of the color names to choose from:
| Color Name | Hex Value | Swatch |
|---|---|---|
| aliceblue | #F0F8FF | |
| antiquewhite | #FAEBD7 | |
| aqua | #00FFFF | |
| aquamarine | #7FFFD4 | |
| azure | #F0FFFF | |
| beige | #F5F5DC | |
| bisque | #FFE4C4 | |
| black | #000000 | |
| blanchedalmond | #FFEBCD | |
| blue | #0000FF | |
| blueviolet | #8A2BE2 | |
| brown | #A52A2A | |
| burlywood | #DEB887 | |
| cadetblue | #5F9EA0 | |
| chartreuse | #7FFF00 | |
| chocolate | #D2691E | |
| coral | #FF7F50 | |
| cornflowerblue | #6495ED | |
| cornsilk | #FFF8DC | |
| crimson | #DC143C | |
| cyan | #00FFFF | |
| darkblue | #00008B | |
| darkcyan | #008B8B | |
| darkgoldenrod | #B8860B | |
| darkgray | #A9A9A9 | |
| darkgrey | #A9A9A9 | |
| darkgreen | #006400 | |
| darkkhaki | #BDB76B | |
| darkmagenta | #8B008B | |
| darkolivegreen | #556B2F | |
| darkorange | #FF8C00 | |
| darkorchid | #9932CC | |
| darkred | #8B0000 | |
| darksalmon | #E9967A | |
| darkseagreen | #8FBC8F | |
| darkslateblue | #483D8B | |
| darkslategray | #2F4F4F | |
| darkslategrey | #2F4F4F | |
| darkturquoise | #00CED1 | |
| darkviolet | #9400D3 | |
| deeppink | #FF1493 | |
| deepskyblue | #00BFFF | |
| dimgray | #696969 | |
| dimgrey | #696969 | |
| dodgerblue | #1E90FF | |
| firebrick | #B22222 | |
| floralwhite | #FFFAF0 | |
| forestgreen | #228B22 | |
| fuchsia | #FF00FF | |
| gainsboro | #DCDCDC | |
| ghostwhite | #F8F8FF | |
| gold | #FFD700 | |
| goldenrod | #DAA520 | |
| gray | #808080 | |
| grey | #808080 | |
| green | #008000 | |
| greenyellow | #ADFF2F | |
| honeydew | #F0FFF0 | |
| hotpink | #FF69B4 | |
| indianred | #CD5C5C | |
| indigo | #4B0082 | |
| ivory | #FFFFF0 | |
| khaki | #F0E68C | |
| lavender | #E6E6FA | |
| lavenderblush | #FFF0F5 | |
| lawngreen | #7CFC00 | |
| lemonchiffon | #FFFACD | |
| lightblue | #ADD8E6 | |
| lightcoral | #F08080 | |
| lightcyan | #E0FFFF | |
| lightgoldenrodyellow | #FAFAD2 | |
| lightgray | #D3D3D3 | |
| lightgrey | #D3D3D3 | |
| lightgreen | #90EE90 |
| Color Name | Hex Value | Swatch |
|---|---|---|
| lightpink | #FFB6C1 | |
| lightsalmon | #FFA07A | |
| lightseagreen | #20B2AA | |
| lightskyblue | #87CEFA | |
| lightslategray | #778899 | |
| lightslategrey | #778899 | |
| lightsteelblue | #B0C4DE | |
| lightyellow | #FFFFE0 | |
| lime | #00FF00 | |
| limegreen | #32CD32 | |
| linen | #FAF0E6 | |
| magenta | #FF00FF | |
| maroon | #800000 | |
| mediumaquamarine | #66CDAA | |
| mediumblue | #0000CD | |
| mediumorchid | #BA55D3 | |
| mediumpurple | #9370D8 | |
| mediumseagreen | #3CB371 | |
| mediumslateblue | #7B68EE | |
| mediumspringgreen | #00FA9A | |
| mediumturquoise | #48D1CC | |
| mediumvioletred | #C71585 | |
| midnightblue | #191970 | |
| mintcream | #F5FFFA | |
| mistyrose | #FFE4E1 | |
| moccasin | #FFE4B5 | |
| navajowhite | #FFDEAD | |
| navy | #000080 | |
| oldlace | #FDF5E6 | |
| olive | #808000 | |
| olivedrab | #6B8E23 | |
| orange | #FFA500 | |
| orangered | #FF4500 | |
| orchid | #DA70D6 | |
| palegoldenrod | #EEE8AA | |
| palegreen | #98FB98 | |
| paleturquoise | #AFEEEE | |
| palevioletred | #D87093 | |
| papayawhip | #FFEFD5 | |
| peachpuff | #FFDAB9 | |
| peru | #CD853F | |
| pink | #FFC0CB | |
| plum | #DDA0DD | |
| powderblue | #B0E0E6 | |
| purple | #800080 | |
| red | #FF0000 | |
| rosybrown | #BC8F8F | |
| royalblue | #4169E1 | |
| saddlebrown | #8B4513 | |
| salmon | #FA8072 | |
| sandybrown | #F4A460 | |
| seagreen | #2E8B57 | |
| seashell | #FFF5EE | |
| sienna | #A0522D | |
| silver | #C0C0C0 | |
| skyblue | #87CEEB | |
| slateblue | #6A5ACD | |
| slategray | #708090 | |
| slategrey | #708090 | |
| snow | #FFFAFA | |
| springgreen | #00FF7F | |
| steelblue | #4682B4 | |
| tan | #D2B48C | |
| teal | #008080 | |
| thistle | #D8BFD8 | |
| tomato | #FF6347 | |
| turquoise | #40E0D0 | |
| violet | #EE82EE | |
| wheat | #F5DEB3 | |
| white | #FFFFFF | |
| whitesmoke | #F5F5F5 | |
| yellow | #FFFF00 | |
| yellowgreen | #9ACD32 |
Резюме
Добавление фона и градиентов на наши страницы позволяет нам раскрасить фасад дизайна. Эти функции также помогают определить, как сгруппирован контент и улучшить макет наших страниц в целом.
Кратко, в этом уроке мы рассмотрели следующее:
- как добавить цвет фона и фоновое изображение к элементам;
- линейные и радиальные градиенты и их настройка;
- как задать несколько фоновых изображений для одного элемента;
- новые свойства CSS3, которые позволяют менять размер, площадь поверхности и область позиционирования фоновых изображений
Добавление цвета фона, градиентов и изображений приносит немало возможностей для улучшения общего дизайна наших веб-сайтов. Вскоре мы обсудим, как семантически добавлять изображения (отдельно от фоновых изображений) для наших страниц. Но перед этим давайте взглянем на то, как семантически создавать списки.
CSS Multiple Backgrounds
CSS allows you to add multiple background images for an element, through the
property.
The different background images are separated by commas, and the images are
stacked on top of each other, where the first image is closest to the viewer.
The following example has two background images, the first image is a flower
(aligned to the bottom and right) and the second image is a paper background (aligned to the top-left corner):
#example1 { background-image: url(img_flwr.gif), url(paper.gif); background-position: right bottom, left top; background-repeat: no-repeat, repeat;}
Multiple background images can be specified using either the individual
background properties (as above) or the shorthand property.
The following example uses the shorthand property (same result as
example above):
CSS background-clip Property
The CSS property specifies the painting area of the background.
The property takes three different values:
- border-box — (default) the background is painted to the outside edge of the border
- padding-box — the background is painted to the outside edge of the padding
- content-box — the background is painted within the content box
The following example illustrates the property:
Example
#example1
{
border: 10px dotted black;
padding: 35px; background: yellow;
background-clip: content-box;}
CSS Advanced Background Properties
| Property | Description |
|---|---|
| background | A shorthand property for setting all the background properties in one declaration |
| background-clip | Specifies the painting area of the background |
| background-image | Specifies one or more background images for an element |
| background-origin | Specifies where the background image(s) is/are positioned |
| background-size | Specifies the size of the background image(s) |
❮ Previous
Next ❯
Background Color HTML
A typical webpage consists of different elements. These can be submitted buttons, checkboxes, sign up or login buttons, a facility for smooth scrolling, a banner and carousel, and much more.
We use HTML properties and CSS to style all these elements. But even if all the elements look pretty, there needs to be a proper background for the page. This can be an image or just a color.
For this, you need to specify the color you want to the HTML style tag. Or, you might add your desired background color to the CSS stylesheet.
In this article, we will discuss the different aspects of setting the background color to the web page and its various elements.
HSLA Colors
HSLA color values are an extension of HSL color values with an alpha channel — which specifies the opacity
for a color.
An HSLA color value is specified with: hsla(hue, saturation, lightness, alpha), where the
alpha parameter defines the opacity. The alpha parameter is a number between 0.0 (fully transparent) and 1.0 (fully opaque).
hsla(0, 100%, 30%, 0.3);
hsla(0, 100%, 50%, 0.3);
hsla(0, 100%, 70%, 0.3);
hsla(0, 100%, 90%, 0.3);
The following example defines different HSLA colors:
Example
#p1 {background-color: hsla(120, 100%, 50%, 0.3);} /* green with opacity */#p2 {background-color: hsla(120, 100%, 75%, 0.3);} /* light green with opacity */#p3 {background-color: hsla(120, 100%, 25%, 0.3);} /* dark
green with opacity */#p4 {background-color: hsla(120, 60%, 70%, 0.3);} /* pastel green
with opacity */
Фон на веб-странице
Установка фонового рисунка на веб-страницу традиционно происходит через атрибут
background тега <body>.
Такой рисунок повторяется по горизонтали и вертикали, заполняя таким способом
все окно браузера. Понятно, что особых вариантов для творчества здесь нет, поэтому
обратимся к стилям и посмотрим, что же можно делать с помощью CSS.
В CSS имеется пять атрибутов, которые управляют фоновой картинкой: ее добавлением,
положением и повторением. Однако все эти параметры заменяет одно универсальное
свойство background, его и будем использовать в
дальнейшем.
Добавление фонового рисунка
Добавление рисунка происходит путем установки адреса картинки через ключевое
слово url. Чтобы управлять повторением картинки
применяются аргументы no-repeat (нет повторения),
repeat-x (повторение по горизонтали) и repeat-y
(повторение по вертикали). Благодаря этому можно получить веб-страницу, приведенную
на рис. 1.
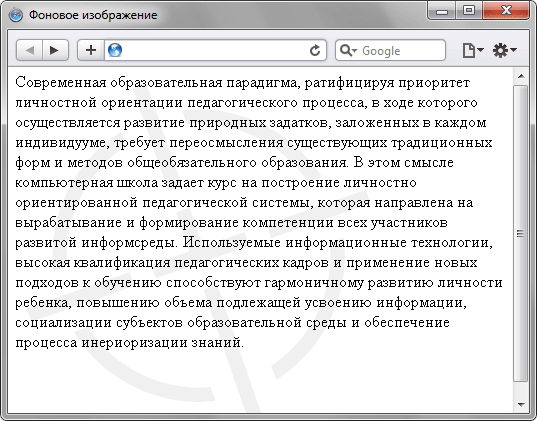
Рис. 1. Фоновая картинка без повторения
Чтобы установить картинку на веб-страницу, следует добавить стилевое свойство background
к селектору BODY, как показано в примере 1.
Пример 1. Фоновый рисунок
В данном примере графический рисунок target.gif определяется как фон веб-страницы
без повторения изображения. Чтобы картинка не прилегала плотно к краям браузера,
она смещается на 30 пикселов вправо и на 20 пикселов вниз от своего исходного
положения.
Повторение рисунка
Благодаря тому, что можно задавать повторение фонового рисунка по горизонтали
или вертикали, доступно несколько вариантов оформления веб-страниц. Например,
для создания вертикальной полосы по левому краю (рис. 2) понадобится изображение,
показанное на рис. 3.
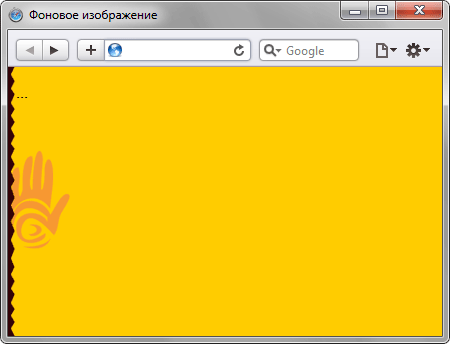
Рис. 2. Повторение рисунка по вертикали
Рис. 3. Картинка для создания фона
Рисунок должен быть таким, чтобы по вертикали он состыковывался между собой
без заметных швов, а также составлял единое целое с заданным цветом фона веб-страницы.
В примере 2 приводится создание такого фонового рисунка, опять же с помощью
свойства background и его значения repeat-y.
Пример 2. Повторение фона по вертикали
Аналогично можно делать повторение фона по горизонтали, например, создав градиент
и установив его в качестве фоновой картинки (рис. 4).
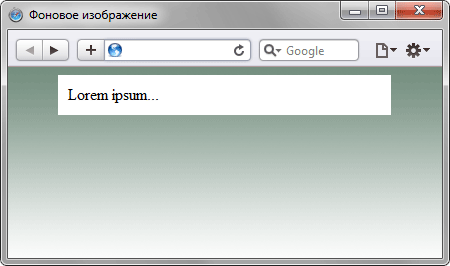
Рис. 4. Использование градиента в качестве фона
Чтобы получить веб-страницу, приведенную на рис. 4, потребуется вначале
сделать картинку с градиентным переходом. Ширину достаточно указать 20-40 пикселов,
а высота рисунка зависит от цели документа и предполагаемой высоты содержимого
веб-страницы. Не стоит также забывать, что рисунок большого размера приведет
к увеличению объема графического файла. А это отрицательно скажется на скорости
его загрузки и, в конечном итоге, приведет к замедлению отображения фона. Для данного
случая вполне подошла картинка размером 30х200 пикселов (рис. 5).
Рис. 5. Градиентное изображение для создания фона
В примере 3 показан код HTML для создания градиентного фона.
Пример 3. Повторение фона по горизонтали
Градиентный рисунок хорошо сочетается с одноцветным блоком, поэтому в данном
примере добавляется слой, в котором и отображается содержимое веб-страницы.
Transparency using RGBA
If you do not want to apply opacity to child elements, like in our example above, use RGBA color values.
The following example sets the opacity for the background color and not the text:
100% opacity
60% opacity
30% opacity
10% opacity
You learned from our CSS Colors Chapter, that you can use RGB as a color value. In addition to RGB,
you can use an RGB color value with an alpha channel (RGBA) — which specifies the opacity for a color.
An RGBA color value is specified with: rgba(red, green, blue, alpha). The
alpha parameter is a number between 0.0 (fully transparent) and 1.0 (fully opaque).
Tip: You will learn more about RGBA Colors in our CSS Colors Chapter.
Свойство CSS background-size
Свойство определяет размер (масштаб) фонового изображения или градиента. В качестве значений можно использовать либо ключевые слова ((дефолтное значение), , ), либо относительные (%) или абсолютные (px) величины.
Если используются ключевые слова:
- означает, что фоновая картинка должна покрывать всю площадь элемента, даже если для этого ее нужно растянуть или обрезать по одному краю.
- означает, что фоновая картинка должна полностью поместиться в размеры элемента, даже если часть его площади будет не покрыта ей.
- означает, что размер изображения будет рассчитан браузером в зависимости от его размера и соотношения сторон.
Изучаем новые свойства фона
Наряду с градиентами и несколькими фоновыми изображениями, CSS3 представил три новых свойства: background-size, background-clip и background-origin.
Свойство background-size позволяет изменить размер фонового изображения, в то время как свойства background-clip и background-origin позволяют контролировать, как фоновое изображение обрезается и где фоновое изображение располагается в элементе (внутри border или внутри padding, например).
background-size
Свойство background-size позволяет указать размер фонового изображения. Это свойство принимает несколько значений, в том числе размер и ключевые слова.
При использовании размера мы можем указать ширину и высоту с помощью двух значений разделённых пробелом. Первое значение установит ширину фонового изображения, а второе значение его высоту
Важно отметить, что процентная запись связана с размером элемента, а не с исходным размером фоновой картинки
Следовательно, свойство background-size с шириной 100% установит, что фоновое изображение занимает всю ширину элемента. Если второе значение не определено после ширины, то значение высоты будет задано автоматически, чтобы сохранить пропорции фонового изображения.
Ключевое слово auto может быть задействовано в качестве значения ширины или высоты, чтобы сохранить пропорции фонового изображения. Так, если мы хотим установить высоту фоновой картинки на 75% от высоты элемента при сохранении её пропорций, то можем задать значение background-size как auto 75%.
Ключевые слова cover и contain
В дополнение к размерам свойство background-size также допускает ключевые слова cover и contain.
Значение cover указывает, что фоновое изображение будет изменено, чтобы полностью закрыть ширину и высоту элемента. Исходное соотношение сторон фоновой картинки будет сохранено, пока изображение будет растягиваться или сжиматься по мере необходимости, чтобы охватить элемент целиком. Часто при использовании значения cover часть фонового изображения обрезается, чтобы изображение занимало всю доступную площадь элемента.
Ключевое слово contain, с другой стороны, указывает, что фоновое изображение будет изменено, чтобы целиком вписаться в ширину и высоту элемента. При этом исходное соотношение сторон фоновое изображение будет сохранено, но картинка будет растягиваться или сжиматься по мере необходимости, чтобы остаться в пределах ширины и высоты элемента. В отличие от cover, ключевое слово contain всегда показывает полное фоновое изображение, при этом зачастую оно не будет занимать всю доступную площадь элемента.
Значения cover и contain могут привести к небольшим искажениям фоновых изображений, особенно, когда картинка растягивается за пределами своих исходных размеров. Мы должны следить за этим при использовании данных значений и убедиться, что стили в результате являются подходящими.
background-clip и background-origin
Свойство background-clip определяет площадь поверхности, которую охватывает фоновое изображение, а свойство background-origin определяет, откуда должно начинаться background-position. Внедрение этих двух новых свойств связано с внедрением трёх новых значений: border-box, padding-box и content-box. Каждое из этих трёх значений может быть использовано для свойств background-clip и background-origin.
Значение свойства background-clip по умолчанию устанавливается как border-box, что позволяет фоновому изображению расширяться в область границ. Между тем, свойство background-origin по умолчанию устанавливается как padding-box, что позволяет фоновому изображению начинаться там же, где и padding у элемента.

Рис. 7.04. Значение border-box расширяет фон до границ элемента

Рис. 7.05. Значение padding-box расширяет фон до padding у элемента, но фон при этом находится внутри границ

Рис. 7.06. Значение content-box содержит фон внутри padding и border у элемента
Мы уже обсуждали значения этих ключевых слов, когда рассматривали свойство box-sizing в уроке 4, «Открываем блочную модель». Смысл самих значений не изменился, но их функции меняются при использовании разных свойств фона.
CSS Background Size
The CSS property allows you to specify the size of background images.
The size can be specified in lengths, percentages, or by using one of the two
keywords: contain or cover.
The following example resizes a background image to much smaller than the original image (using pixels):
Lorem Ipsum Dolor
Lorem ipsum dolor sit amet, consectetuer adipiscing elit, sed diam nonummy nibh euismod tincidunt ut laoreet dolore magna aliquam erat volutpat.
Ut wisi enim ad minim veniam, quis nostrud exerci tation ullamcorper suscipit lobortis nisl ut aliquip ex ea commodo consequat.
Here is the code:
Example
#div1
{
background: url(img_flower.jpg);
background-size: 100px 80px; background-repeat: no-repeat;
}
The two other possible values for are
and .
The keyword scales the background image to be as large as possible
(but both its width and its height must fit inside the content area). As such, depending on the proportions of the background
image and the background positioning area, there may be some areas of
the background which are not covered by the background image.
The keyword scales the background image so that the content area is
completely covered by the background image (both its width and height are equal to or
exceed the content area). As such, some parts of the background image may not be
visible in the background positioning area.
The following example illustrates the use of and :
Example
#div1
{
background: url(img_flower.jpg);
background-size: contain; background-repeat: no-repeat;
}#div2
{
background: url(img_flower.jpg);
background-size: cover;
background-repeat: no-repeat;
}
Define Sizes of Multiple Background Images
The property also accepts multiple values for background size
(using a comma-separated list), when working with multiple backgrounds.
The following example has three background images specified, with different
background-size value for each image:
Example
#example1 { background: url(img_tree.gif) left top
no-repeat, url(img_flwr.gif) right bottom no-repeat, url(paper.gif) left top
repeat; background-size: 50px, 130px, auto;}
Full Size Background Image
Now we want to have a background image on a website that covers the entire
browser window at all times.
The requirements are as follows:
- Fill the entire page with the image (no white space)
- Scale image as needed
- Center image on page
- Do not cause scrollbars
The following example shows how to do it; Use the <html> element
(the <html> element is always at least the height of the browser window). Then set a fixed and centered background on it.
Then adjust its size with the
background-size property:
Example
html { background: url(img_man.jpg) no-repeat
center fixed; background-size: cover;}
Hero Image
You could also use different background properties on a <div> to create a hero image (a large image with text), and place it where you want.
Example
.hero-image { background: url(img_man.jpg) no-repeat center;
background-size: cover; height: 500px; position:
relative;}
CSS background-origin Property
The CSS property specifies where the background image is
positioned.
The property takes three different values:
- border-box — the background image starts from the upper left corner of the border
- padding-box — (default) the background image starts from the upper left corner of the padding edge
- content-box — the background image starts from the upper left corner of the content
The following example illustrates the property:
Example
#example1
{
border: 10px solid black; padding: 35px; background: url(img_flwr.gif);
background-repeat: no-repeat;
background-origin: content-box;}
CSS background-clip Property
The CSS property specifies the painting area of the background.
The property takes three different values:
- border-box — (default) the background is painted to the outside edge of the border
- padding-box — the background is painted to the outside edge of the padding
- content-box — the background is painted within the content box
The following example illustrates the property:
Example
#example1
{
border: 10px dotted black;
padding: 35px; background: yellow;
background-clip: content-box;}
CSS Advanced Background Properties
| Property | Description |
|---|---|
| background | A shorthand property for setting all the background properties in one declaration |
| background-clip | Specifies the painting area of the background |
| background-image | Specifies one or more background images for an element |
| background-origin | Specifies where the background image(s) is/are positioned |
| background-size | Specifies the size of the background image(s) |
❮ Previous
Next ❯
Example
We will discuss the background-color property below, exploring examples of how to use this property in CSS.
Using Hexadecimal
Let’s look at a CSS background-color example where we have provided a hexadecimal value for the color.
In this CSS background-color example, we have provided a hexadecimal value of #FFFFFF which would display the background color as white for the <div> tag.
Using RGB
We can also provide the background-color value using rgb.
In this CSS background-color example, rgb(0,0,0) would also display background color as white for the <div> tag.
Using Color Name
Let’s look at a CSS background-color example where we have provided the value as a named color.
In this CSS background-color example, we have provided the name «white» which would also set the background color of the <div> to white.